Kube-Hetzner
A fully automated, optimized and auto-upgradable, HA-able, k3s cluster on Hetzner Cloud 🤑
About The Project
Hetzner Cloud is a good cloud provider that offers very affordable prices for cloud instances. The goal of this project was to create an optimal Kubernetes installation with it. We wanted functionality that was as close as possible to GKE's auto-pilot.
Here's what is working at the moment:
- Lightweight and resource-efficient Kubernetes with k3s, and Fedora nodes to take advantage of the latest Linux kernels.
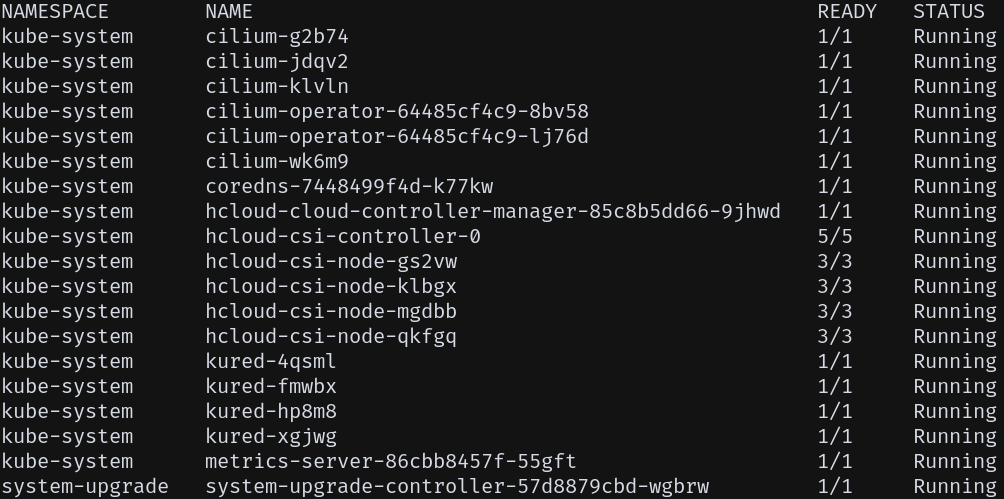
- Optimal Cilium CNI with full BPF support and Kube-proxy replacement. It uses the Hetzner private subnet underneath to communicate between the nodes, so no encryption is needed.
- Automatic OS upgrades, supported by kured that initiate a reboot of the node only when necessary and after having drained it properly.
- Automatic HA by setting the required number of servers and agents nodes.
- Automatic k3s upgrade by using Rancher's system-upgrade-controller and tracking the latest 1.x stable branch.
- Optional Nginx ingress controller that will automatically use Hetzner's private network to allocate a Hetzner load balancer.
It uses Terraform to deploy as it's easy to use, and Hetzner provides a great Hetzner Terraform Provider.
Getting started
Follow those simple steps and your world cheapest Kube cluster will be up and running in no time.
Prerequisites
First and foremost, you need to have a Hetzner Cloud account. You can sign up for free here.
Then you'll need you have both the terraform and helm, and kubectl cli installed. The easiest way is to use the gofish package manager to install them.
gofish install terraform
gofish install helm
gofish install kubectl
Creating terraform.tfvars
- Create a project in your Hetzner Cloud Console, and go to Security > API Tokens of that project to grab the API key.
- Generate an ssh key pair for your cluster, unless you already have one that you'd like to use.
- Rename terraform.tfvars.example to terraform.tfvars and replace the values from steps 1 and 2.
(Optional) Customize other variables
The number of control plane nodes and worker nodes, and the Hetzner datacenter location, can be customized by adding the variables to your newly created terraform.tfvars file.
See the default values in the variables.tf file, they correspond to (you can copy-paste and customize):
servers_num      = 2
agents_num       = 2
server_location  = "fsn1"
Installation
terraform init
terraform apply -auto-approve
It will take a few minutes to complete, and then you should see a green output with the IP addresses of the nodes. Then you can immediately kubectl into it without any further action.
Usage
When the cluster is on, you can do whatever you wish with it! 🎉
Useful commands
- List your nodes IPs, with either of those:
terraform outputs
hcloud server list
- See the Hetzner network config:
hcloud network describe k3s-net
- Log into one of your nodes (replace the location of your private key if needed):
ssh root@xxx.xxx.xxx.xxx -i ~/.ssh/id_ed25519 -o StrictHostKeyChecking=no
Cilium commands
- Check the status of cilium with the following commands (get the cilium pod name first and replace it in the command):
kubectl -n kube-system exec --stdin --tty cilium-xxxx -- cilium status
kubectl -n kube-system exec --stdin --tty cilium-xxxx -- cilium status --verbose
- Monitor cluster traffic with:
kubectl -n kube-system exec --stdin --tty cilium-xxxx -- cilium monitor
- See the list of kube services with:
kubectl -n kube-system exec --stdin --tty cilium-xxxx -- cilium service list
For more cilium commands, please refer to their corresponding Documentation.
Automatic upgrade
The nodes and k3s versions are configured to self-upgrade unless you turn that feature off.
- To turn OS upgrade off, log in to each node and issue:
systemctl disable --now dnf-automatic.timer
- To turn off k3s upgrade, use kubectl to set the k3s_upgrade label to false for each node (replace the node-name in the command):
kubectl label node node-name k3s_upgrade=false
Individual components upgrade
To upgrade individual components, you can use the following commands:
- Hetzner CCM
kubectl apply -f manifests/hcloud-ccm-net.yaml
- Hetzner CSI
kubectl apply -f https://raw.githubusercontent.com/hetznercloud/csi-driver/master/deploy/kubernetes/hcloud-csi.yml
- Rancher's system upgrade controller
kubectl apply -f https://raw.githubusercontent.com/rancher/system-upgrade-controller/master/manifests/system-upgrade-controller.yaml
- Kured (used to reboot the nodes after upgrading and draining them)
latest=$(curl -s https://api.github.com/repos/weaveworks/kured/releases | jq -r .[0].tag_name)
kubectl apply -f https://github.com/weaveworks/kured/releases/download/$latest/kured-$latest-dockerhub.yaml
- Last but not least, upgrading Cilium itself
helm upgrade --values=manifests/helm/cilium/values.yaml cilium cilium/cilium -n kube-system
Takedown
- To take down your cluster, it's simple:
terraform destroy -auto-approve
- Sometimes, the Hetzner network does not get deleted on its own (probably due to a temporary bug); we have to delete it manually after running the first command and re-run it.
hcloud network delete k3s-net
terraform destroy -auto-approve
Roadmap
See the open issues for a list of proposed features (and known issues).
Contributing
Any contributions you make are greatly appreciated.
- Fork the Project
- Create your Branch (
git checkout -b AmazingFeature) - Commit your Changes (
git commit -m 'Add some AmazingFeature') - Push to the Branch (
git push origin AmazingFeature) - Open a Pull Request
License
The following code is distributed as-is and under the MIT License. See LICENSE for more information.
Contact
Karim Naufal - @mysticaltech - karim.naufal@me.com
Project Link: https://github.com/mysticaltech/kube-hetzner
Acknowledgements
- k-andy was the starting point for this project. It wouldn't have been possible without it.
- Best-README-Template that made writing this readme a lot easier.


